
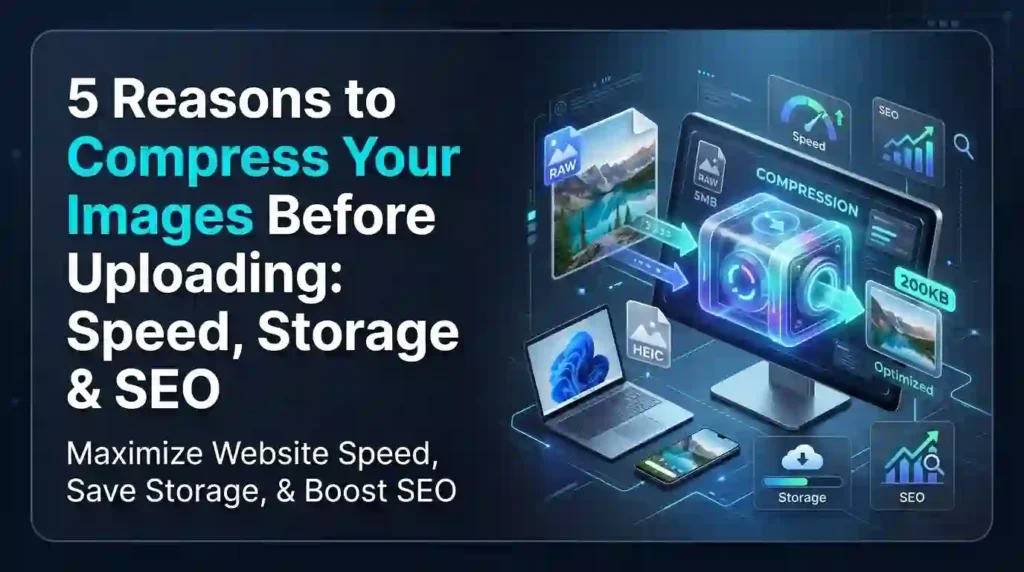
If you’ve ever uploaded a photo straight from your phone or camera to your website, you’ve probably uploaded a file that’s far bigger than it needs to be. A single uncompressed photo can be 5–10MB, while the same image, properly compressed, might only need 100–300KB to look just as sharp on screen.
That difference might sound small, but multiply it across dozens of product photos, blog images, or portfolio pieces, and you’re looking at a website that loads slowly, eats up your hosting storage, and quietly hurts your search rankings.
In this guide, we’ll walk through exactly why you should compress images before uploading — covering speed, storage, and SEO — plus how to do it properly without losing visual quality. By the end, you’ll know exactly which tools to use and how to make image compression part of your everyday workflow.
What Is Image Compression (and How Does It Actually Work)?
Image compression is the process of reducing a file’s size by removing unnecessary data, without significantly changing how the image looks. Think of it like packing a suitcase efficiently — you’re fitting the same essentials into a smaller space.
There are two main approaches:
- Lossy compression removes some image data permanently, slightly reducing quality in exchange for a much smaller file size. JPEG is the most common example.
- Lossless compression reduces file size by reorganizing data more efficiently, without removing any visual information at all. PNG typically uses lossless compression.
For most websites, a smart lossy compression (where quality loss is invisible to the human eye) offers the best balance — dramatically smaller files with virtually no visible difference. This is exactly what a good image compressor does automatically: it analyzes your image and strips out the data your eyes won’t miss.
Why Image Compression Matters More Than Ever in 2026
A few years ago, image compression was mostly a “nice to have.” Today, it’s closer to essential — and here’s why:
- Mobile traffic now dominates most websites, and mobile users are far more likely to abandon a slow-loading page.
- Google’s page experience signals, including Core Web Vitals, directly factor loading speed into how pages rank.
- Cloud storage and hosting plans often come with bandwidth limits — large images quietly eat into both.
- Visual content (product photos, blog images, social posts) keeps growing, meaning the total “weight” of a typical webpage keeps climbing too.
The good news? Fixing this is one of the easiest, highest-impact changes you can make to a website — and it usually takes just seconds per image with the right tool.
Reason 1 — Faster Page Load Speed and Better Core Web Vitals
Why are large images bad for SEO? Because they’re often the single biggest contributor to slow page load speed — and speed is something Google actively measures and rewards.
Google’s Core Web Vitals include a metric called Largest Contentful Paint (LCP), which measures how long it takes for the largest visible element on your page — very often a hero image or banner — to fully load. If that image is a massive, uncompressed file, your LCP score suffers, and so does your page experience rating.
Here’s the practical impact: an uncompressed 4MB hero image might take several seconds to load on a typical mobile connection. Compress that same image down to 200–400KB, and it can load in a fraction of a second — often without any visible difference in quality.
You can test your own pages using Google’s official PageSpeed Insights tool, which scores your site and specifically flags “unoptimized images” as an improvement opportunity: https://pagespeed.web.dev/
If you want to fix this quickly, our free Image Compressor lets you shrink JPEG and PNG files in seconds, right before you upload them.
Reason 2 — Improved SEO Rankings and Visibility
How does image size affect website loading speed — and in turn, SEO ranking? Page speed is a confirmed ranking factor, and Google has been explicit that Core Web Vitals form part of its page experience signals. A faster site doesn’t just please visitors; it directly supports better visibility in search results.
But the SEO benefits of compression go beyond raw speed:
- Faster-loading pages tend to have lower bounce rates, which is a strong signal of a good user experience.
- Optimized images are more likely to appear in Google Images search results, which can drive meaningful additional traffic.
- Pages that load quickly on mobile are more likely to perform well in mobile-first indexing, which is how Google primarily crawls and ranks most websites today.
Compression works hand-in-hand with other image SEO best practices — like descriptive file names and alt text — to help search engines understand and surface your visual content. We’ll cover those in more detail later in this guide.
Reason 3 — Reduced Storage and Bandwidth Costs
This reason is less talked about, but it adds up fast: every image you upload takes up storage space, and every time a visitor loads your page, that image consumes bandwidth.
Consider a simple example:
- An online store with 500 product photos at 4MB each uses roughly 2GB of storage just for images.
- Compress those same images to an average of 300KB each, and total storage drops to around 150MB — a reduction of over 90%.
- If each product page gets a few thousand views per month, that storage saving translates directly into bandwidth savings too — which matters if your hosting plan has usage limits or tiered pricing.
For anyone managing a growing website, blog, or online store, this is a simple way to keep hosting costs predictable as your content library expands — without needing to upgrade your plan just because your media library got heavier.
Reason 4 — Better User Experience and Lower Bounce Rates
Speed isn’t just a technical metric — it’s something users feel immediately. Research consistently shows that as page load time increases, the likelihood of a visitor leaving before the page even finishes loading increases sharply.
Large, uncompressed images are one of the most common causes of this kind of friction, especially for:
- Mobile users on slower connections
- Visitors in regions with limited bandwidth
- Pages with multiple images (galleries, product grids, blog posts with lots of visuals)
When images load quickly, pages feel responsive and professional — which builds trust, especially for e-commerce sites where visitors are deciding whether to make a purchase. A smoother experience also means visitors are more likely to browse further, view more pages, and ultimately convert.
Reason 5 — Smoother Uploads and Social Media Sharing
Compression isn’t just about your website — it also matters the moment you’re uploading content anywhere.
Why should you compress images before uploading to social media? A few practical reasons:
- Many platforms automatically compress large images anyway — but their compression algorithms aren’t always kind to image quality, and pre-compressing with a tool you control often produces better results.
- Smaller files upload faster, which matters when you’re posting from a mobile connection or uploading in bulk.
- For platforms with file size limits (common with email attachments, CMS media libraries, or upload forms), compression can be the difference between a successful upload and an error message.
This is especially useful for content creators and small business owners managing multiple platforms — compress once, then upload the same lightweight file everywhere, knowing it’ll look sharp and load quickly no matter where it lands.
Lossy vs Lossless Compression — What’s the Difference?
This is one of the most common questions people have, so let’s make it simple.
Lossy compression reduces file size by selectively discarding image data — typically details the human eye is less likely to notice, like subtle color gradients or fine texture in busy areas of a photo. JPEG is the classic example. Done well, lossy compression can reduce file size by 60–80% with no visible quality loss at normal viewing sizes.
Lossless compression reduces file size without discarding any image data at all — it simply encodes the existing data more efficiently. PNG is a common lossless format, which is why PNGs with large areas of solid color (like logos or icons) compress very well, while PNGs of complex photos often remain quite large.
For most website photos, lossy compression at a high quality setting (often 70–85% quality) offers the best balance — visually identical to the original, but a fraction of the file size. For logos, icons, and graphics with sharp edges or transparency, lossless formats or SVG are usually a better fit.
Best Image Formats for the Web (JPEG vs PNG vs WebP vs AVIF vs SVG)
What is the best image format for web SEO? The honest answer is: it depends on what the image contains.
- JPEG — Best for photos and complex images with lots of color variation. Good compression, widely supported.
- PNG — Best for images that need transparency, or graphics with sharp lines, text, and flat colors (like logos). Larger file sizes for photos.
- WebP — A modern format developed by Google that typically produces smaller files than both JPEG and PNG at similar quality, while supporting transparency and animation. Increasingly the recommended default for web images.
- AVIF — An even newer next-gen format that can offer even smaller file sizes than WebP, though support across older browsers and editing tools is still catching up.
- SVG — Ideal for logos, icons, and illustrations made of shapes and lines rather than pixels. SVGs scale perfectly to any size with tiny file sizes, but aren’t suitable for photographs.
Is WebP better than JPEG for websites? In most cases, yes — WebP files are typically 25–35% smaller than equivalent JPEGs at the same visual quality, which is why many modern websites and CMS platforms now serve WebP by default.
If you’re working with PNGs that need converting to a more web-friendly format, our WebP to PNG Converter and WebP to JPG Converter make it easy to switch formats depending on your needs.
For logos and icons, converting between PNG and SVG is also straightforward with our PNG to SVG Converter and SVG to PNG Converter.
How to Compress Images Without Losing Quality (Step-by-Step)
Here’s a simple, repeatable workflow for how to compress images without losing quality, whether you’re handling a single photo or a whole batch:
- Resize first, if needed. If your image is physically larger than it needs to be on the page (for example, a 4000px-wide photo displayed at 800px), resize it down first. Image resolution vs display size matters — there’s no benefit to keeping pixels that will never be shown.
- Choose the right format. Photos generally compress best as JPEG or WebP; graphics with transparency or flat colors work well as PNG or SVG.
- Run it through a compressor. Upload your image to a tool that automatically applies smart lossy compression — most modern compressors can reduce file size by 60–80% while keeping quality visually identical.
- Compare before and after. A good compressor will show you the size reduction (for example, “4.2MB → 320KB”) so you can confirm the savings before downloading.
- Batch process when possible. If you’re handling multiple images — like a product catalog — use a tool that supports bulk compression to save time.
Our free Image Compressor handles steps 3 and 4 automatically — just upload your JPEG or PNG, and it returns a smaller file ready to use.
And if you’re working across different formats — say converting PNG to JPG before compressing, or HEIC photos from an iPhone into a more universal format — our Image Converter and HEIC to JPG Converter cover those conversions in one place.
Image SEO Best Practices — File Names, Alt Text, and More
Compression handles the technical side of image SEO, but pairing it with good metadata practices rounds out the picture. A few quick wins:
- Use descriptive file names. Instead of “IMG_4821.jpg,” rename files to something descriptive like “blue-leather-handbag-front-view.jpg” before uploading — this helps search engines understand what the image shows.
- Write meaningful alt text. Alt text describes the image for screen readers and search engines alike. A good alt tag is concise and descriptive — for example, “Woman wearing a blue leather handbag over her shoulder” rather than just “bag” or “image1.”
- Keep dimensions appropriate. Don’t upload an image at 3000px wide if it will only ever display at 600px — this ties back directly to compression and file size.
- Use responsive images where possible. Modern websites can serve different image sizes to different devices (via srcset), so mobile users download smaller files than desktop users.
These practices work together: a well-named, well-described, properly compressed image gives search engines every signal it needs to understand and potentially surface your content — including in Google Images and AI-generated overviews.
Best Free Tools to Compress and Convert Images
There’s no shortage of image tools out there, but here’s what to look for in a good one:
- Speed — compression should take seconds, not minutes
- No quality loss at normal viewing sizes — you shouldn’t be able to tell the difference
- Support for multiple formats — JPEG, PNG, WebP, and increasingly AVIF
- Batch processing — especially useful for e-commerce stores or content creators with large media libraries
- No software installation — browser-based tools save time and work across devices
Why choose Free Converters for this? Our toolkit is built specifically around these needs — fast, free, browser-based, and designed for exactly the kind of everyday image tasks website owners and content creators face. You can explore advanced tools at Free Converters covering compression, format conversion, and more, all in one place.
Beyond images, the same logic applies to documents — if you’re dealing with large PDFs (product catalogs, brochures, reports), our PDF Compressor works the same way, shrinking file size while keeping content readable.
Real-World Example: An E-commerce Store’s Page Speed Transformation
Consider a small online store selling handmade jewelry, with around 200 product photos uploaded directly from a DSLR camera — each averaging 6MB.
Before any optimization, the store’s product pages were loading in 6–8 seconds on mobile, and PageSpeed Insights flagged “properly size images” and “serve images in next-gen formats” as the top issues.
The store owner ran each product photo through an image compressor, converting from the original format to JPEG at a high-quality compression setting, and resizing images to match the actual display size on the product page (1200px wide, rather than the original 4000px).
The results:
- Average image file size dropped from 6MB to roughly 250KB — a reduction of over 95%
- Page load time on mobile improved from 6–8 seconds to under 2 seconds
- The store’s PageSpeed score moved from the “poor” range into the “good” range for LCP
While SEO results take time to show up in rankings, the immediate improvement in load speed and user experience was noticeable right away — and the store owner now compresses every new product photo before uploading, as a standard part of their workflow.
Common Mistakes to Avoid When Compressing Images
Even with the right tools, a few habits can undermine your results:
- Compressing too aggressively. Pushing quality settings too low can introduce visible artifacts — blurry edges, blocky patterns, or color banding. Aim for the smallest file size that still looks clean at normal viewing distance.
- Uploading at the wrong dimensions. Compression helps, but if you’re uploading a 4000px image to display at 600px, you’re still wasting bandwidth — resize first.
- Forgetting to compress before re-uploading edited versions. Every time an image is re-saved (especially in editing software), file size can creep back up if compression settings aren’t reapplied.
- Ignoring format choice. Using PNG for photos (when JPEG or WebP would be smaller) or JPEG for logos (when PNG or SVG would look sharper) often leads to unnecessarily large files.
- Not checking results. Always do a quick before-and-after comparison — both in file size and visual quality — before publishing.
The fix for all of these is the same: build compression into your upload routine, using a tool that shows you the results clearly.
Frequently Asked Questions
Why should I compress images before uploading? Compressing images before uploading reduces file size dramatically — often by 60–90% — which speeds up page loading, saves storage and bandwidth, and supports better SEO performance.
Does compressing images reduce quality? With smart lossy compression at high-quality settings, the difference is typically invisible to the human eye, even though the file size drops significantly.
What is the best file format for compressed images? JPEG and WebP are generally best for photos, PNG works well for graphics needing transparency, and SVG is ideal for logos and icons — WebP often offers the smallest file sizes overall.
How does image size affect SEO ranking? Large images slow down page load speed, which negatively affects Core Web Vitals like Largest Contentful Paint — a factor Google considers as part of its page experience signals.
What tools can I use to compress images for free? Free, browser-based tools like our Image Compressor let you reduce JPEG and PNG file sizes instantly without installing any software.
How much can image compression reduce file size? Depending on the original image and format, compression can typically reduce file size by 60–90% with little to no visible change in quality.
Does image compression affect page load speed? Yes — smaller image files download faster, directly improving page load times, especially on mobile connections.
What’s the difference between lossy and lossless compression? Lossy compression removes some image data to achieve smaller files (with minimal visible impact at high quality settings), while lossless compression reduces file size without removing any data at all.
Final Thoughts and Next Steps
Compressing your images before uploading is one of the simplest changes you can make that touches speed, storage, and SEO all at once. It costs nothing, takes seconds, and the benefits — faster pages, lower hosting costs, better user experience, and stronger search visibility — compound every time you publish new content.
The easiest way to build this into your routine is to make compression the very last step before any upload. Try it right now with our free Image Compressor, convert between formats with the Image Converter if needed, and if you’re working with PDFs too, the PDF Compressor follows the same simple process.
Explore the full toolkit at Free Converters and make smaller, faster, smarter files part of everything you publish.

Pingback: Make Images Smaller for WhatsApp Without Losing Quality
Pingback: Free Convertors : How to Use It (Beginner's Guide)
Pingback: Can You Recover Image Quality After Compression? Truth